
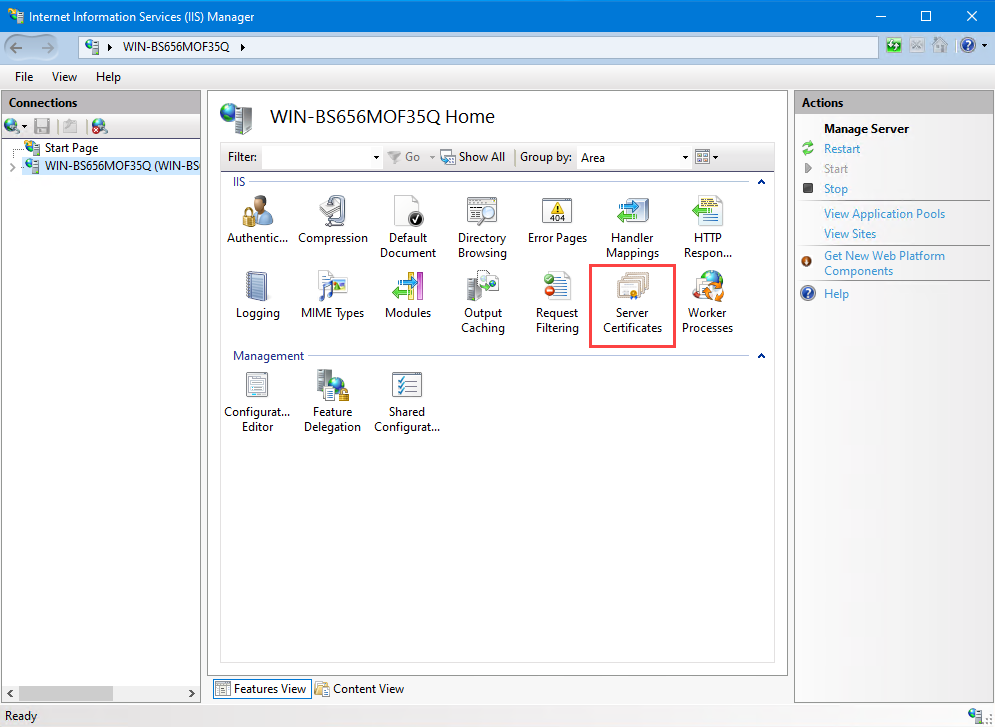
Step 1: Access Server Certificates Manager in IIS
Launch IIS Manager and click the server name in the Connections menu on the left. On the Home page for the server, locate the IIS section in the center window and double click Server Certificates. The Server Certificates control panel will open in the center window.
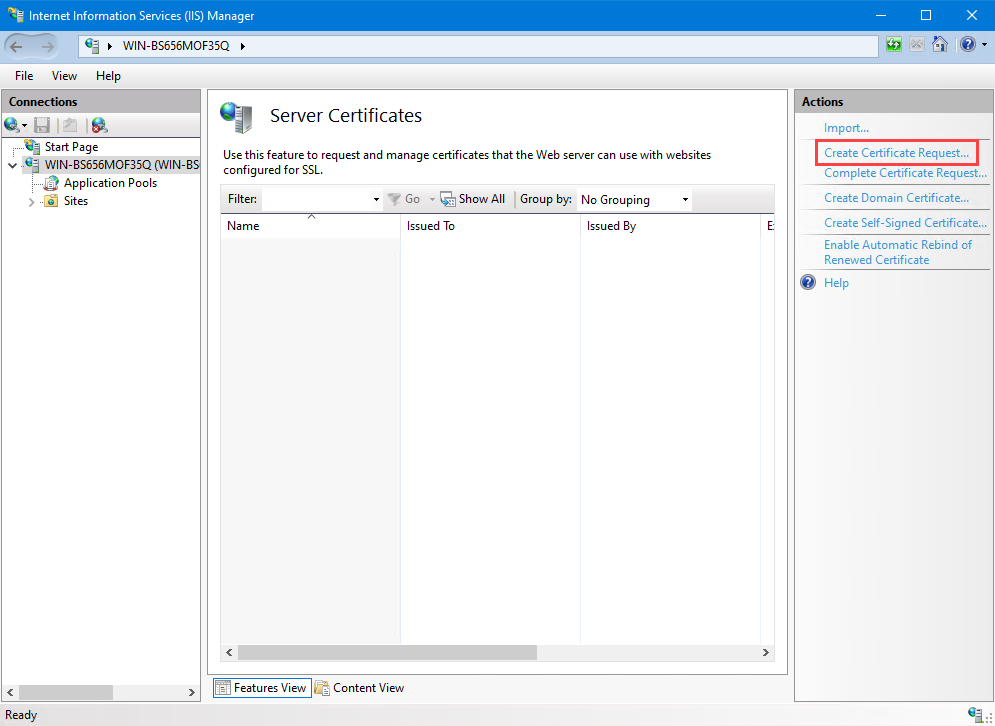
Step 2: Create Certificate Request
In the right-side Actions menu, click "Create Certificate Request…". The Request Certificate wizard will open in a new window.
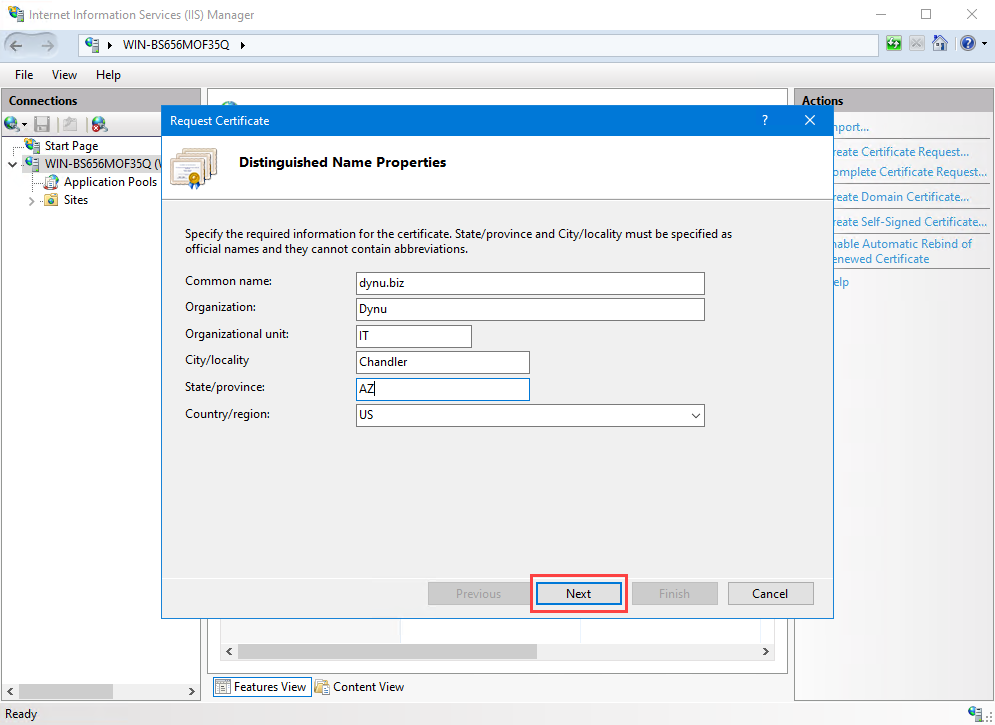
Fill out the Distinguished Name Properties and click the 'Next' button.
Common name: Must be a fully-qualified domain name (FQDN) like “domain.com”.
Organization: Your organization’s legal name. If you do not have a company or organization, put N/A.
Organizational unit: Your department within your organization. If you do not have an organization, put N/A.
City/locality: Your city.
State/province: Your state or region.
Country: Your country (select from drop-down list).
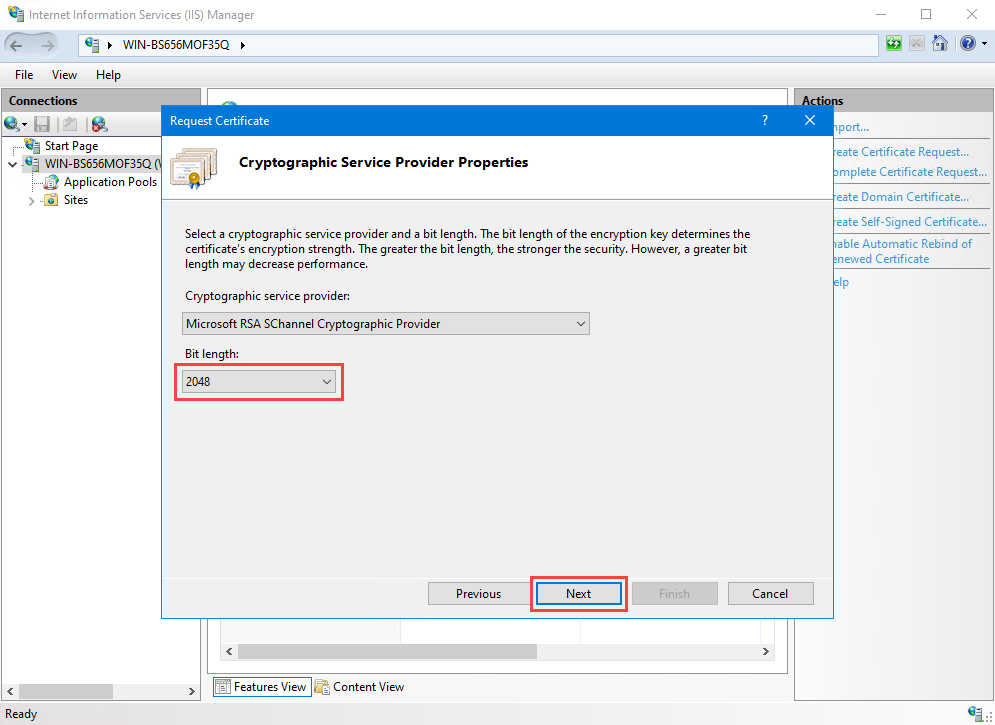
Step 3: Cryptographic Service Provider Properties
On the Cryptographic Service Provider Properties page, select the following options from the drop-down menus:
Cryptographic service provider: Microsoft RSA SChannel Cryptographic Provider
Bit length: 2048
These are the standard options, but you may be able to select different options if needed.
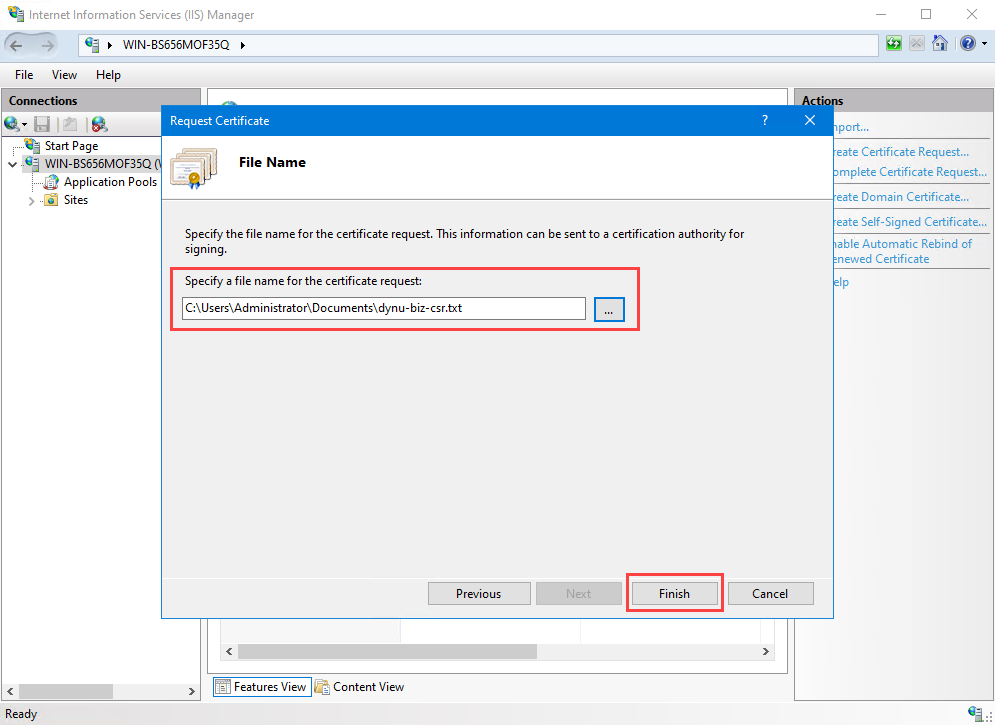
STEP 4: Save the CSR file
On the File Name page, click the … box to specify a name and location to save your CSR file. Click Finish to save the CSR file.
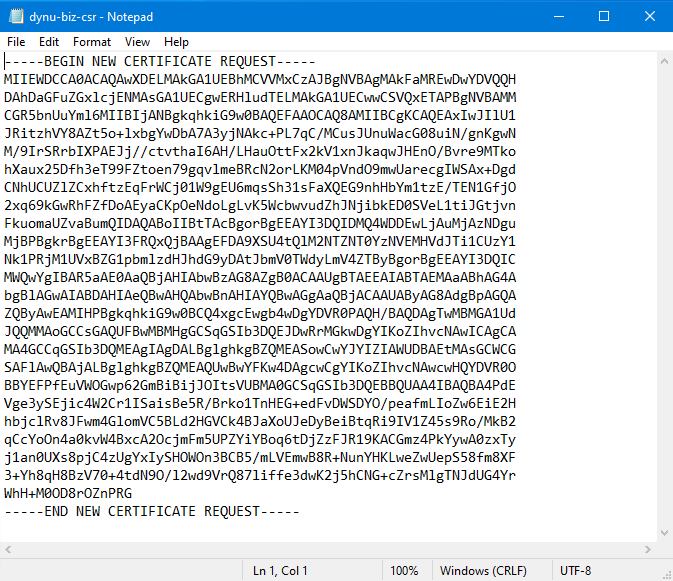
Navigate to the directory where you saved your CSR file and open the CSR in Notepad or your preferred text editor.
Step 5: Verify Certificate Signing Request (CSR) details
You can use the CSR Decoder online tool to verify the details of Certificate Signing Request (CSR).